Turning Scale Modeling from a Hobby into a Career
When I started building miniatures, I never imagined it could pay the bills. It was a knife, glue, foam board—and a quiet evening at the table. Then came the first inquiries, then projects, then a studio. This article is a practical look at how to start, what tools you actually need, where to find clients, and what money to expect at different stages—no hype, just how it works from the inside.
What scale modeling really is
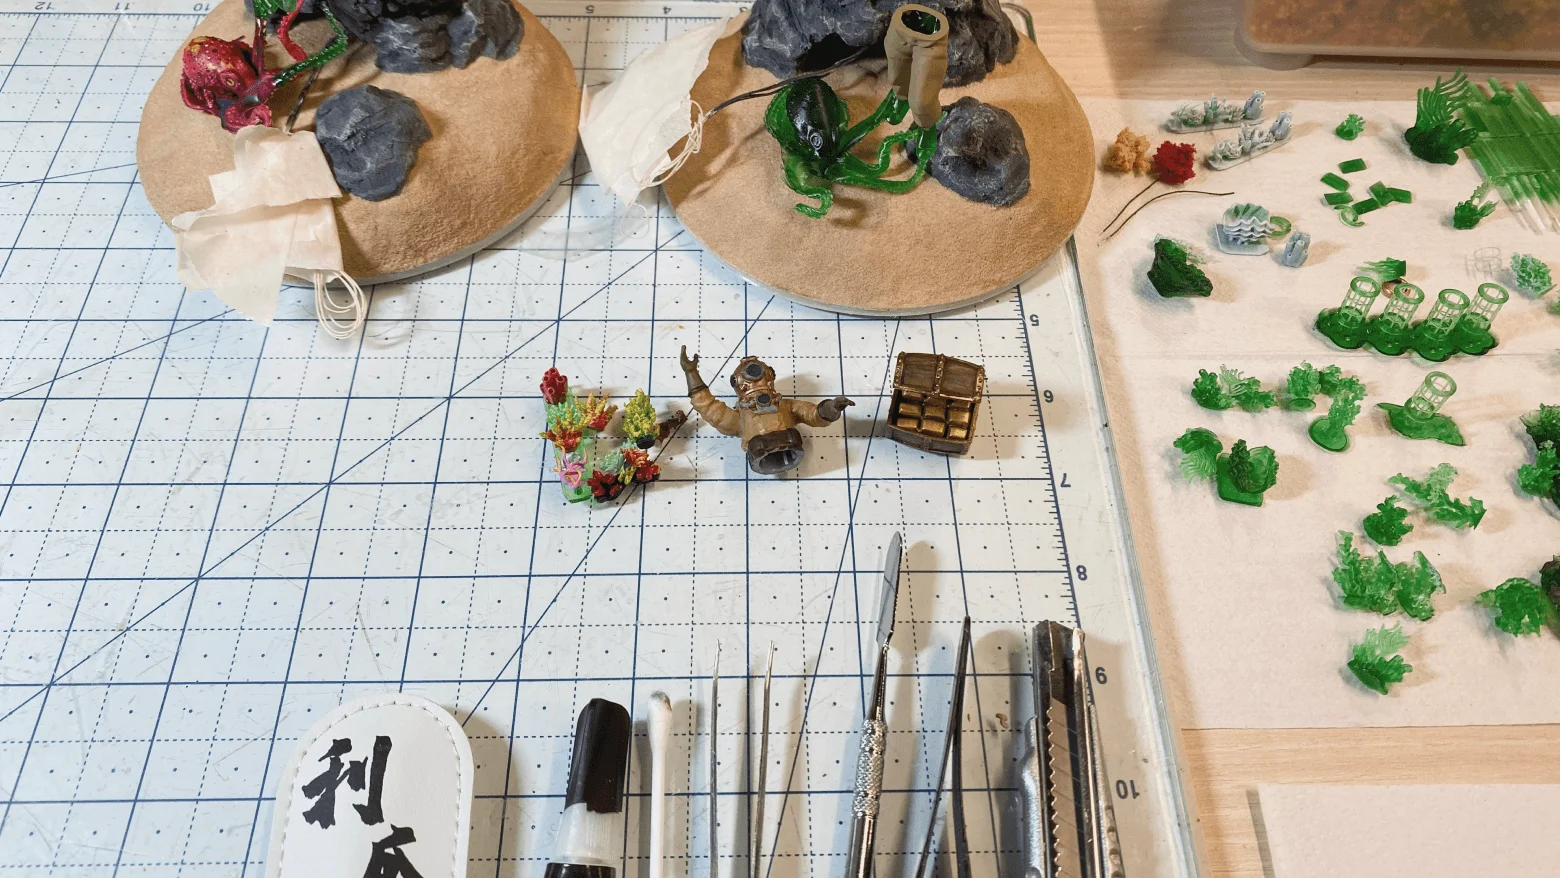
People often say “a model is a smaller copy.” Technically true: houses, streets, vehicles, whole scenes can be built to scale. Look deeper, though: modeling is about conveying atmosphere through materials, texture, and light. Every chip and color shift has a job to do—they tell the story.
Once, models were mostly an architects’ tool for investors and exhibitions. Today the lines are blurred. People love watching a miniature world come to life—flat sheet turning into terrain, plain plastic into form, light “switching on” a scene. That’s why models show up in film and museums, brand activations and creator content, even games—anywhere a tangible, “alive” look beats a render.
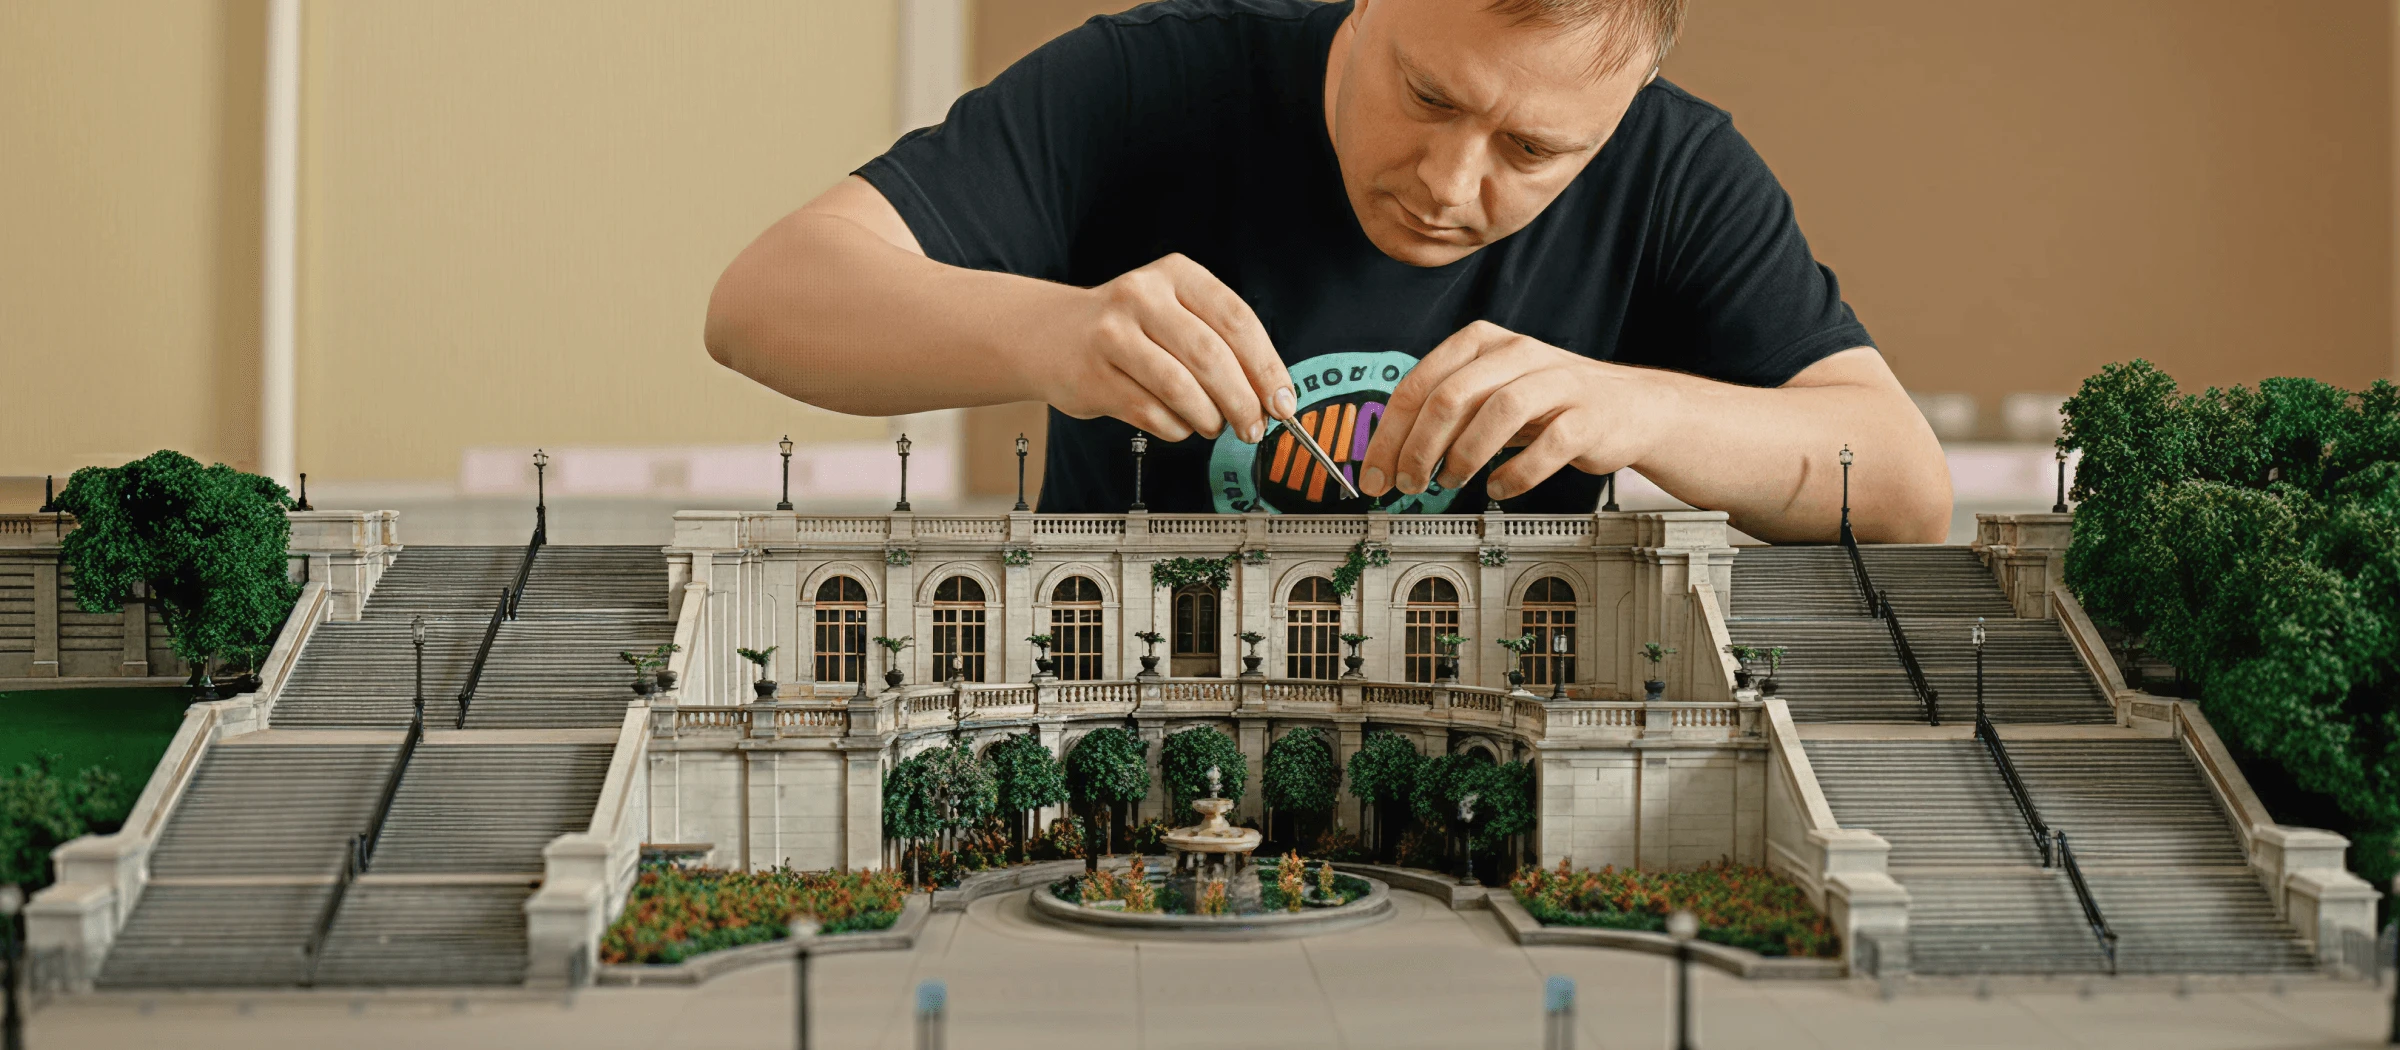
Modeling blends craft, design, and art. You’re an engineer planning structure, an artist working with light and color, and a storyteller shaping meaning. And hand work still matters—the precision and physical presence no render can replace.
How to start: minimum gear, maximum attention
You don’t need an expensive kit. Start with a sharp knife, a metal ruler, glue, and patience. Foam board or XPS foam is perfect early on: cheap, forgiving, and great for learning clean cuts and geometry.
Later you can add styrene and PVC sheets, thin wood, resins, and paint. Don’t buy everything at once. First confirm you enjoy the process itself—accuracy, calm focus, a clear sequence. In scale, a single millimeter off will show.
Pick a small, complete scene: a façade, a room corner, a street slice. Build it end to end: structure, texture, paint, optional lighting, and a finished base. You’ll immediately see gaps—maybe an airbrush would help, or a small 3D printer—but the biggest early win is planning: layout, build order, symmetry control, clean glue joints.
Make the first model for experience, not for likes. You’re learning how materials feel and how scale reads.
Finding your first clients

Start with your circle: friends, interior designers, local architects and fabricators. Show that you’re available for commissions and what you actually do.
Platforms and portfolio. Post process and finished work on Instagram, TikTok, and YouTube Shorts/Reels. Keep a simple portfolio on Squarespace, Wix, Notion, Behance, or ArtStation. Join communities where modelers live: Reddit (r/modelmakers, r/dioramas), Facebook Groups, Discord servers, local maker clubs and museum volunteer groups.
Marketplaces and leads. Etsy works for finished pieces and small runs. Fiverr and Upwork can bring commission leads. Thumbtack helps with local clients. Pitch museums, exhibit houses, agencies, and brands directly with a short deck and two or three strong case studies.
Lower friction for clients. Show your process, typical timelines, scope, and what makes you different (realistic finishes, historical accuracy, integrated lighting). Mention location, shipping options (USPS, UPS, FedEx), deposit terms (30–50 percent), and business setup (sole prop or LLC, invoices, sales tax where relevant). If orders are slow, create a self-initiated build and film it—behind-the-scenes often outperforms ads.
How much you can make: realistic ranges
Income depends on your level, niche, and clients.
Early stage, occasional solo work: about $100–$500 per month. Small pieces for your network and local events.
With steady clients like museums, companies, and exhibits: roughly $1,200–$5,000 per commission. Clear briefs, deadlines, and quality expectations.
Studios handling complex architectural models or brand installations: from about $7,500 per project and up, depending on scale, materials, logistics, and timeline.
Revenue is stepwise. One job pays in a week; another takes a month and barely covers materials. Plan for materials, your time, paints and consumables, packaging, shipping, lighting tests, and revisions. Clients pay for reliability as much as for the object. Consistent content also drives reach and supports higher rates.
Common beginner mistakes and how to avoid them
Starting too big. The urge to impress leads to stress and compromises. Do something simple, but perfectly clean.
Ignoring true costs. Materials seem cheap until you add paint, consumables, packing, shipping, and revision time. Your margin lives in the details—estimate upfront.
Rushing. Modeling is sequence and cleanliness. Even non-experts see sloppy joints and muddled order.
Hiding your process. “I made it for myself—why film?” Because process is your marketing. A few short clips and clean photos answer “can you really do this?”
From hobby to a stable business
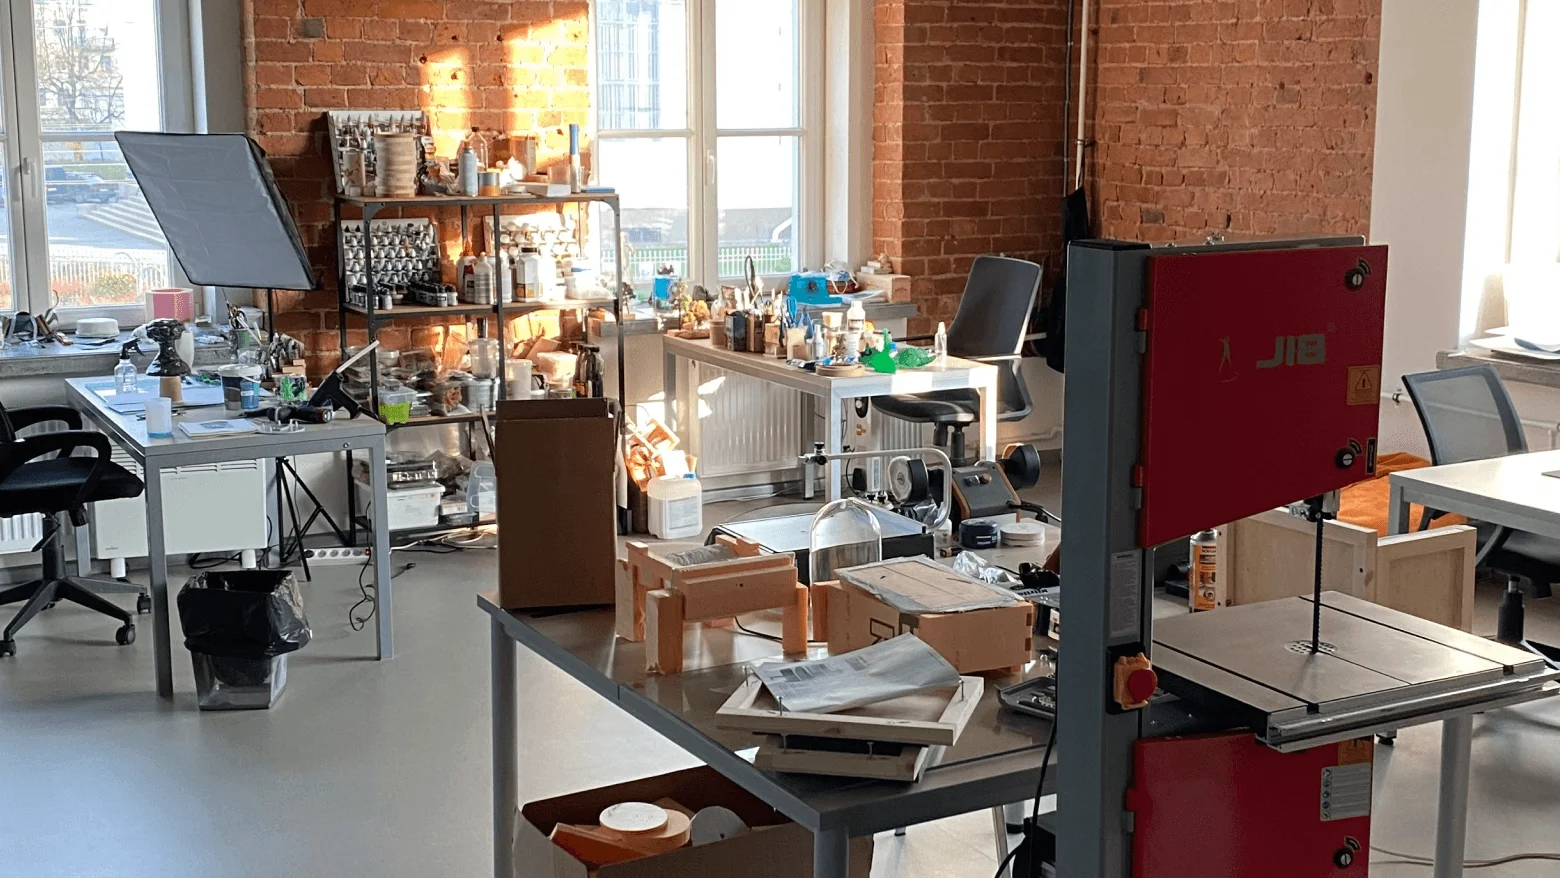
As demand grows, build a system: workstations, inventory and material tracking, schedules, packaging, and a bench of vendors for laser cutting, printing, and 3D services. The invisible work scales too: site and socials, a clear portfolio, estimates, straightforward terms, and invoicing. Organization turns craft into a business.
Over time you realize you’re not just assembling objects—you’re telling stories. Projects gain themes, mood, and context. Seeing your work in museums, offices, and homes brings both income and pride.
Starter kit
Light and bench: a bright neutral lamp with diffusion and a stable cutting surface.
Cutting and shaping: knife with fresh blades, metal ruler, square, tweezers, needle files, fine sandpaper and sanding sponges.
Materials: foam board or XPS, sheet styrene or PVC (1–2 mm), clear plastic, PVA and CA glues, a light filler or acrylic putty.
Finishing: a basic acrylic paint set, permanent markers for micro detail; add an airbrush and compressor when you actually need them.
Organization: labeled bins for parts, a simple checklist per build, and a project log.
Estimating a project
Brief and references: size, level of detail, deadline, budget.
Sketch and build plan: structure, subassemblies, and sequence.
Estimate: materials plus time, including tests, revisions, packing, and shipping.
Checkpoints: what the client sees at each stage—frame, texture pass, paint pass.
Handover and packing: final photos or video, vibration protection, and labeling.
Content that works
Three-frame recap per project: before, after, and one hero detail.
Twenty to forty-second clips: cutting, dry-fit, paint pass, lighting moment.
One longer post after completion: concept, materials, tricky parts, lessons learned.
Mistakes and fixes: honest, useful, and proof that you finish well. Consistency beats chasing “perfect.”
Bottom line and first step
If you’ve wanted to try this, start today. You don’t need the perfect moment or fancy gear. Pick a small scene and build it. Modeling isn’t about instant success; it’s about quiet focus and a result you can hold and examine up close. If that resonates, you may have just found your thing.
Thank you for reading.
If you found this useful, please support the author.
Tip the author