How to Cast ~26 Gallons (≈100 L) of Epoxy: A Practical Multi-Layer Deep-Pour Process

Large epoxy casts demand careful planning: the right resin, controlled temperature, and strict layer thickness. Get those wrong and you’ll see overheating, clouding, or cracking. Below is a step-by-step process that scales to ~26 gallons (≈100 L) and beyond by pouring in multiple layers.
Choose the right resin
Avoid fast “tabletop” epoxies—those are for thin coats and will overheat in thick sections. You need a slow-cure, low-exotherm deep-pour casting system rated for thick layers.
Common US deep-pour choices and their typical max single-pour depths (always check the current TDS):
- Superclear Liquid Glass (nominal 4")
Claimed up to 4" (10 cm) in one lift, but performance depends on ambient temperature and total mass. Marketed for 2–6" casts. The manufacturer recommends active cooling (fans, raising the mold for airflow), which effectively means that hitting a full 4" safely usually requires external heat management. - LET’S RESIN Deep Pour (2–4")
Advertised 2–4" in a single pour. Working time is about 80 minutes; final hardness around 85D. For true 4" lifts, that pot life is short, so you must keep batch size modest and shop temperature controlled—faster cure increases exotherm risk on big volumes. - UltraClear Deep Pour (layering required)
Marketing says “up to 6 inches,” but the technical sheet limits a single lift to 2" (≈5 cm). Anything thicker must be built in layers. Treat the TDS single-pour limit as the real constraint, not the headline depth. - MAS Deep Pour
Manufacturer guidance is 0.5–1" per lift. Thicker sections require layering with proper timing between pours.
What to look for in specs/TDS:
- Maximum recommended pour depth per layer (aim for ½–3", depending on product and batch size).
- Long working time (at least several hours).
- Low exotherm claims for bulk casting.
Volume math & workspace setup
When you’re working at large volumes, prep the mold and control shop temperature in advance.
- The mold must be rigid and fully sealed: laminated plywood, metal, acrylic, or laminate with silicone gaskets.
- Seal every joint with caulk or reinforced tape.
- Shop conditions: 68–73°F (20–23°C), relative humidity ≤60%.
Before pouring, keep resin and hardener at room temperature for at least 12 hours. Warmer resin is less viscous and releases bubbles more easily.
Tip: use a ventilated space without drafts—dust and moisture can ruin a deep pour.
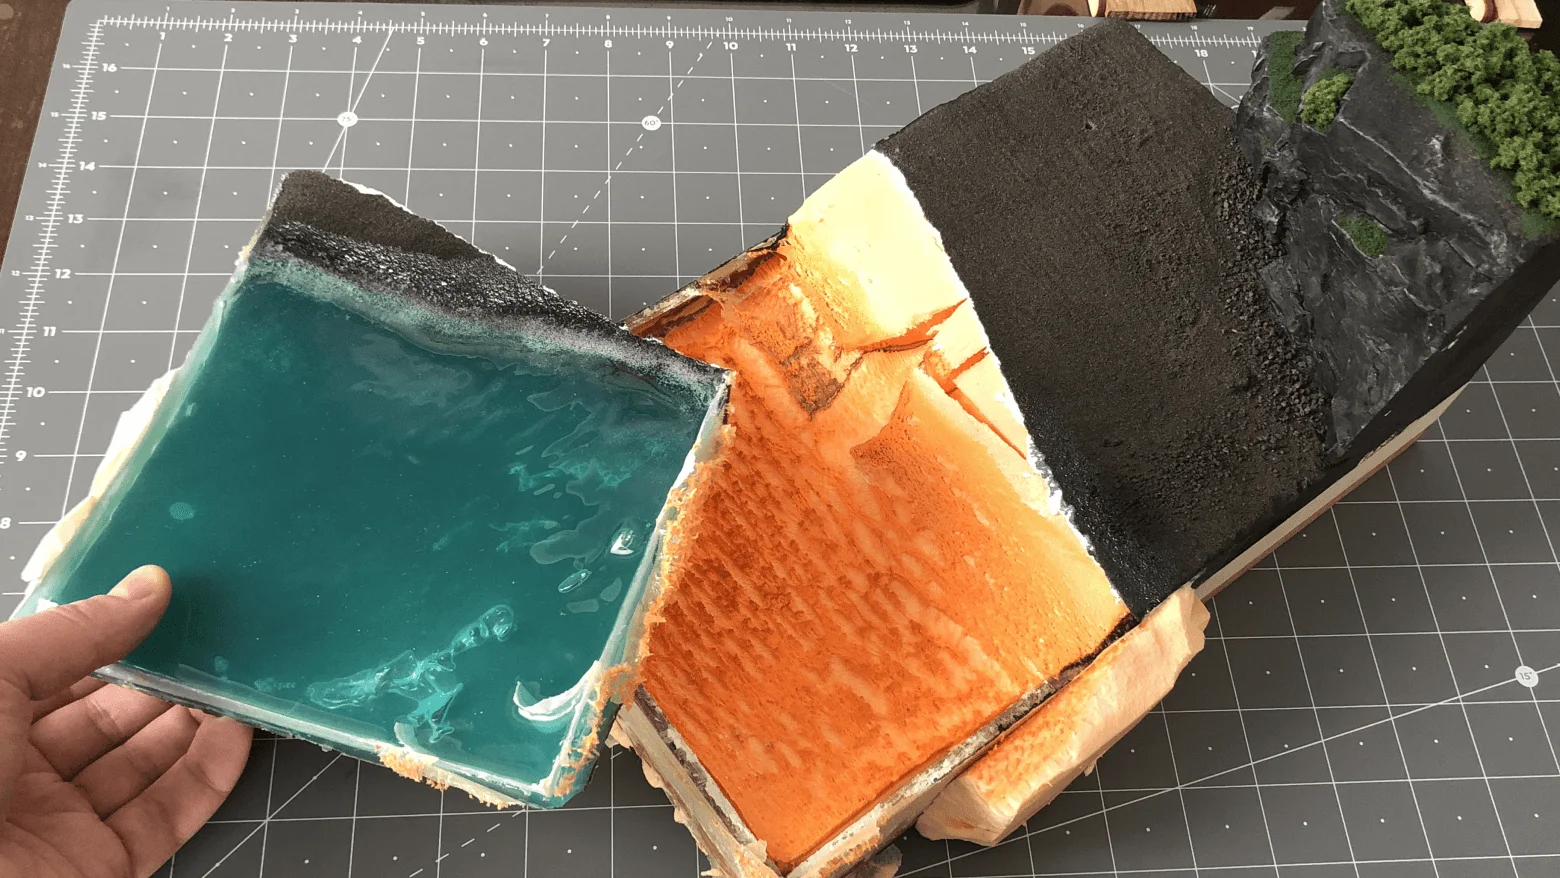
Multi-layer strategy (the only safe way at this scale)

Do not try to dump the whole volume at once. Even deep-pour epoxies will overheat if you exceed their per-layer spec—especially with large batch sizes.
A workable plan for big blocks:
- Layer 1: ~½–1½" if using MAS/FlowCast/RiverCast, up to ~3" if using ThickSet Fathom (confirm for your total volume).
- Timing: Pour the next layer when the previous is in the “tacky/gel” window—usually 12–36 hours depending on resin, temperature, and layer thickness.
- Repeat until you reach the target thickness.
This timing promotes chemical bonding between layers and minimizes visible layer lines.
Temperature and exotherm control
When casting large volumes, temperature control is critical. Epoxy generates heat as it cures, and if a layer is too thick the reaction can run away.
Recommendations:
- Don’t exceed the manufacturer’s single-pour limit (see the TDS).
- For large batches (over 5–8 gal per pour), use active cooling; a freezer can help if managed properly.
- Keep resin temperature below 104–113°F (40–45°C). If the mold gets hot, pause and let the previous layer stabilize before continuing.
Bubble control
Air bubbles are inevitable, but you can manage them. A quick pass with a torch works, but an epoxy-safe bubble-release spray is often the easiest option.
Interlayer bonding
To fuse layers into a single block, you need chemical bonding. Pour the next layer while the previous one is still in the “tacky” stage—sticky to the touch but not runny. This window typically occurs 10–20 hours after a pour (varies by resin).
If you miss that window, it’s fine: degrease the surface and pour the next layer. A faint seam line may be visible at certain angles, but it’s usually not noticeable.
Final surfacing and polish
After the last layer, allow full cure (often 72–96 hours or as specified). Then:
- Demold and trim edges.
- Sand through grits (e.g., P400 → P800 → P1200 → P2000).
- Optionally apply a compatible clear topcoat.
- Polish with microfiber pads and a plastic-safe compound. Keep surface temps modest while polishing.
For a gloss finish, use microfiber polishing pads and a plastic-safe compound; keep the surface under 104°F (40°C) during polishing.
Common failure modes (and how to avoid them)
- Too thick per layer → runaway exotherm, clouding, cracking.
- Using “fast” tabletop epoxies → gels before air escapes → bubbles, heat spikes.
- Leaky/dirty mold → inclusions, bubbles, edge defects.
- Cold materials → high viscosity, trapped air.
- Overlong gaps between layers → weak bond/visible seams.
- High humidity → blush or milky cast.
Bottom line
Deep casting at ~26 gallons isn’t “just more resin.” It’s a controlled, repeatable process: pick a true deep-pour system, obey per-layer limits, manage heat, and time your layers. Do that, and you’ll get a clear, monolithic result without cracks or haze—and you can scale the method reliably for future projects.
Thank you for reading.
If you found this useful, please support the author.
Tip the author