Do you need an art degree to do scale modeling?

Short answer: no. I don’t have an art degree—I’m an engineer by training—and that never stopped me from making convincing work. In modeling, what matters most is your visual literacy (your “trained eye”), an understanding of materials, and confident use of tools. A diploma can speed things up, but it won’t replace practice and attention to detail.
Below: what “visual literacy” is, how to build it, the essential materials and tools to know, and why a lack of formal art school doesn’t block you from producing strong work.
What “visual literacy” means
Visual literacy is your internal library of real-world references and patterns. It’s not just “I looked at a lot of pictures.” It’s knowing how light and shadow actually behave; how rust forms; how wet asphalt darkens; how sea foam breaks; how aged wood, angled glass, or rain-soaked concrete really look; how proportions work in architecture and machines; how surfaces age and where grime collects. Visual literacy turns “kinda looks right” into “this feels real.”
Practically, it’s three skills:
• spotting subtle differences in form, color, and texture;
• quickly recalling a fitting visual solution;
• translating observation into technique—paint, brush, spatula, pigments, printing, cutting.
How to build visual literacy
 Mindless scrolling won’t do it. You need observation with intent and structured breakdowns.
Museums and the street. Visit art and tech museums; shoot your own references outside and in nature. Don’t just chase “pretty.” Give yourself missions: ten photos of metal wear, ten of how wet stone darkens toward the edge, ten of dust on horizontal surfaces. Collect real textures: rust, streaks, efflorescence, flaking paint, moss, sand at the waterline. Note where and why each effect appears.
Film frames and photography. Grab stills from films with great lighting and color. Treat them as lessons in composition and value: where the highest contrast sits, what lines lead the eye, why the scene reads clearly. Break down three main shapes, light direction, dominant hue, and its counterpoint.
Reference decomposition. Pick an image and answer five questions:
overall value of the scene;
where the darkest and lightest areas are;
the primary focal point and how it’s built (contrast, color, detail);
the dominant texture and how to recreate it with your materials;
what to remove or simplify at scale to avoid visual noise.
Mini-studies. Swap big projects for small exercises: a 2×2 inch patch of rusty door, wet tile, damp concrete, a wood chip, an oil stain on asphalt. One study, one technique. Shoot video, take before/after, note mistakes.
Personal reference library. Keep labeled folders on your phone and laptop: Metal_Wear, Stone_Wet, Concrete_Age, Wood_Chips, Water_Surf, Glass_Glare. You’ll save hours hunting for “that perfect” picture.
Reverse literacy. Study bad examples and learn from them: neon-orange rust, identical drips, evenly spaced chips, plastic-looking water gloss. Memorize what to avoid.
Weekly loop. Three days gathering and analyzing references, three days of 30–60 minute studies, one day posting and asking for critique. Small cycles compound fast.
Knowing materials: how surfaces look “for real”
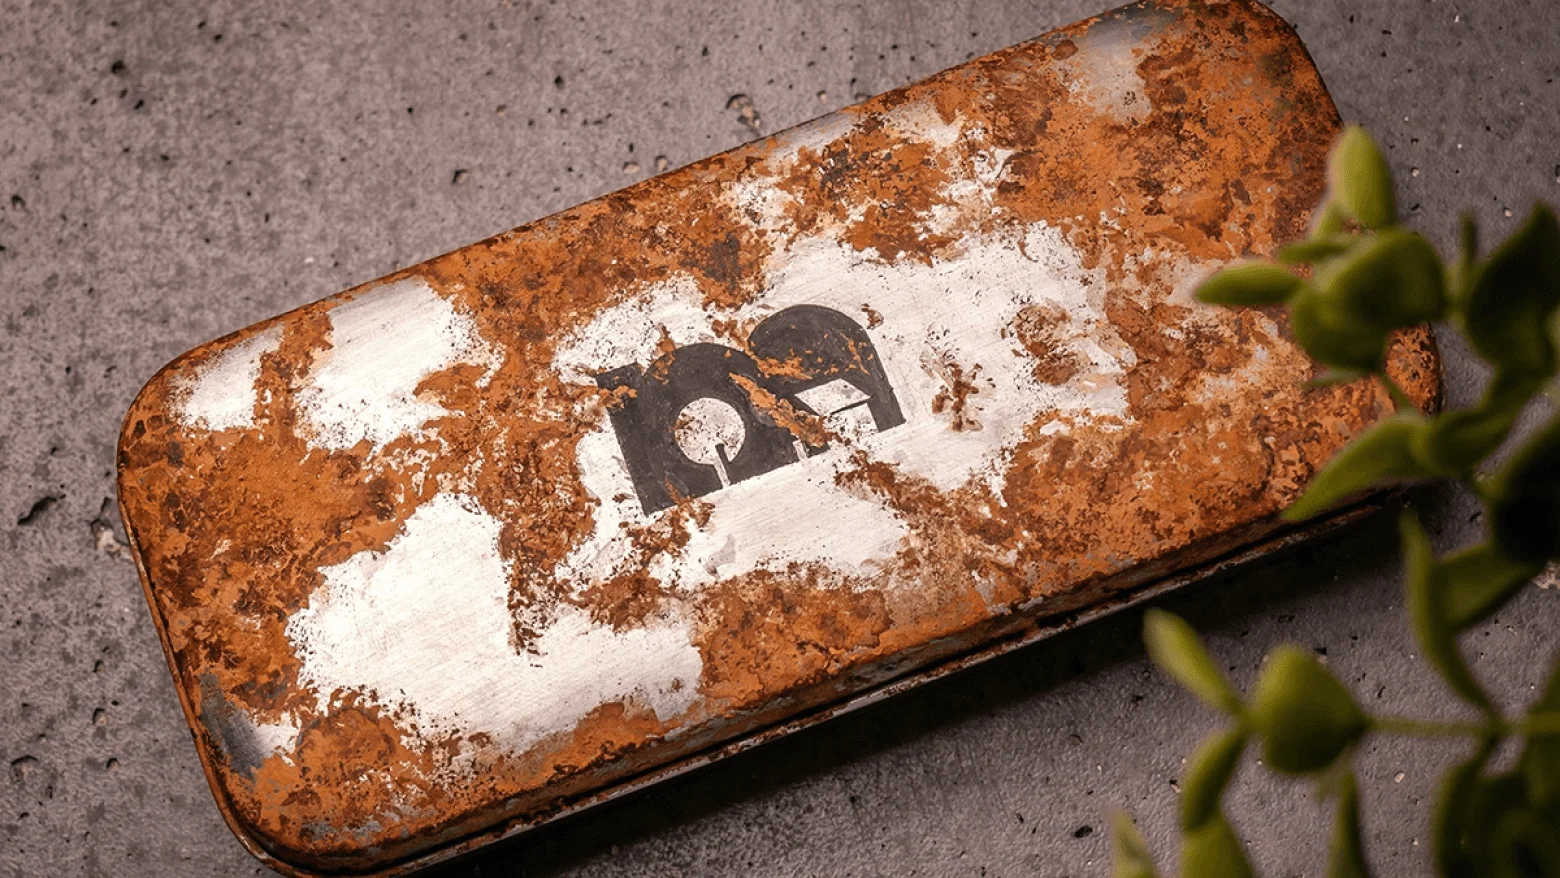
Scale modeling is applied physics and chemistry. You don’t “paint rust”—you simulate corrosion; you don’t “paint water”—you build optics in layers.
Paints. Acrylics dry fast and are easy to control; enamels stay open longer for soft blends; oils give long working time and deep shadows. Learn how they stack: acrylic over enamel, oil over acrylic, which primers match which topcoats.
Varnishes and finishes. Gloss deepens color and reads “wet”; matte hides micro flaws but mutes saturation; satin is a great middle ground. Use mixed finishes in one scene: wet rail, dry ties, oily metal.
Weathering logic. Pigments, washes, filters, chipping, chipping fluids, salt, hairspray, sponges—every effect should obey physics: where things rub, paint wears; where water runs, you get streaks; where heat hits, colors fade.
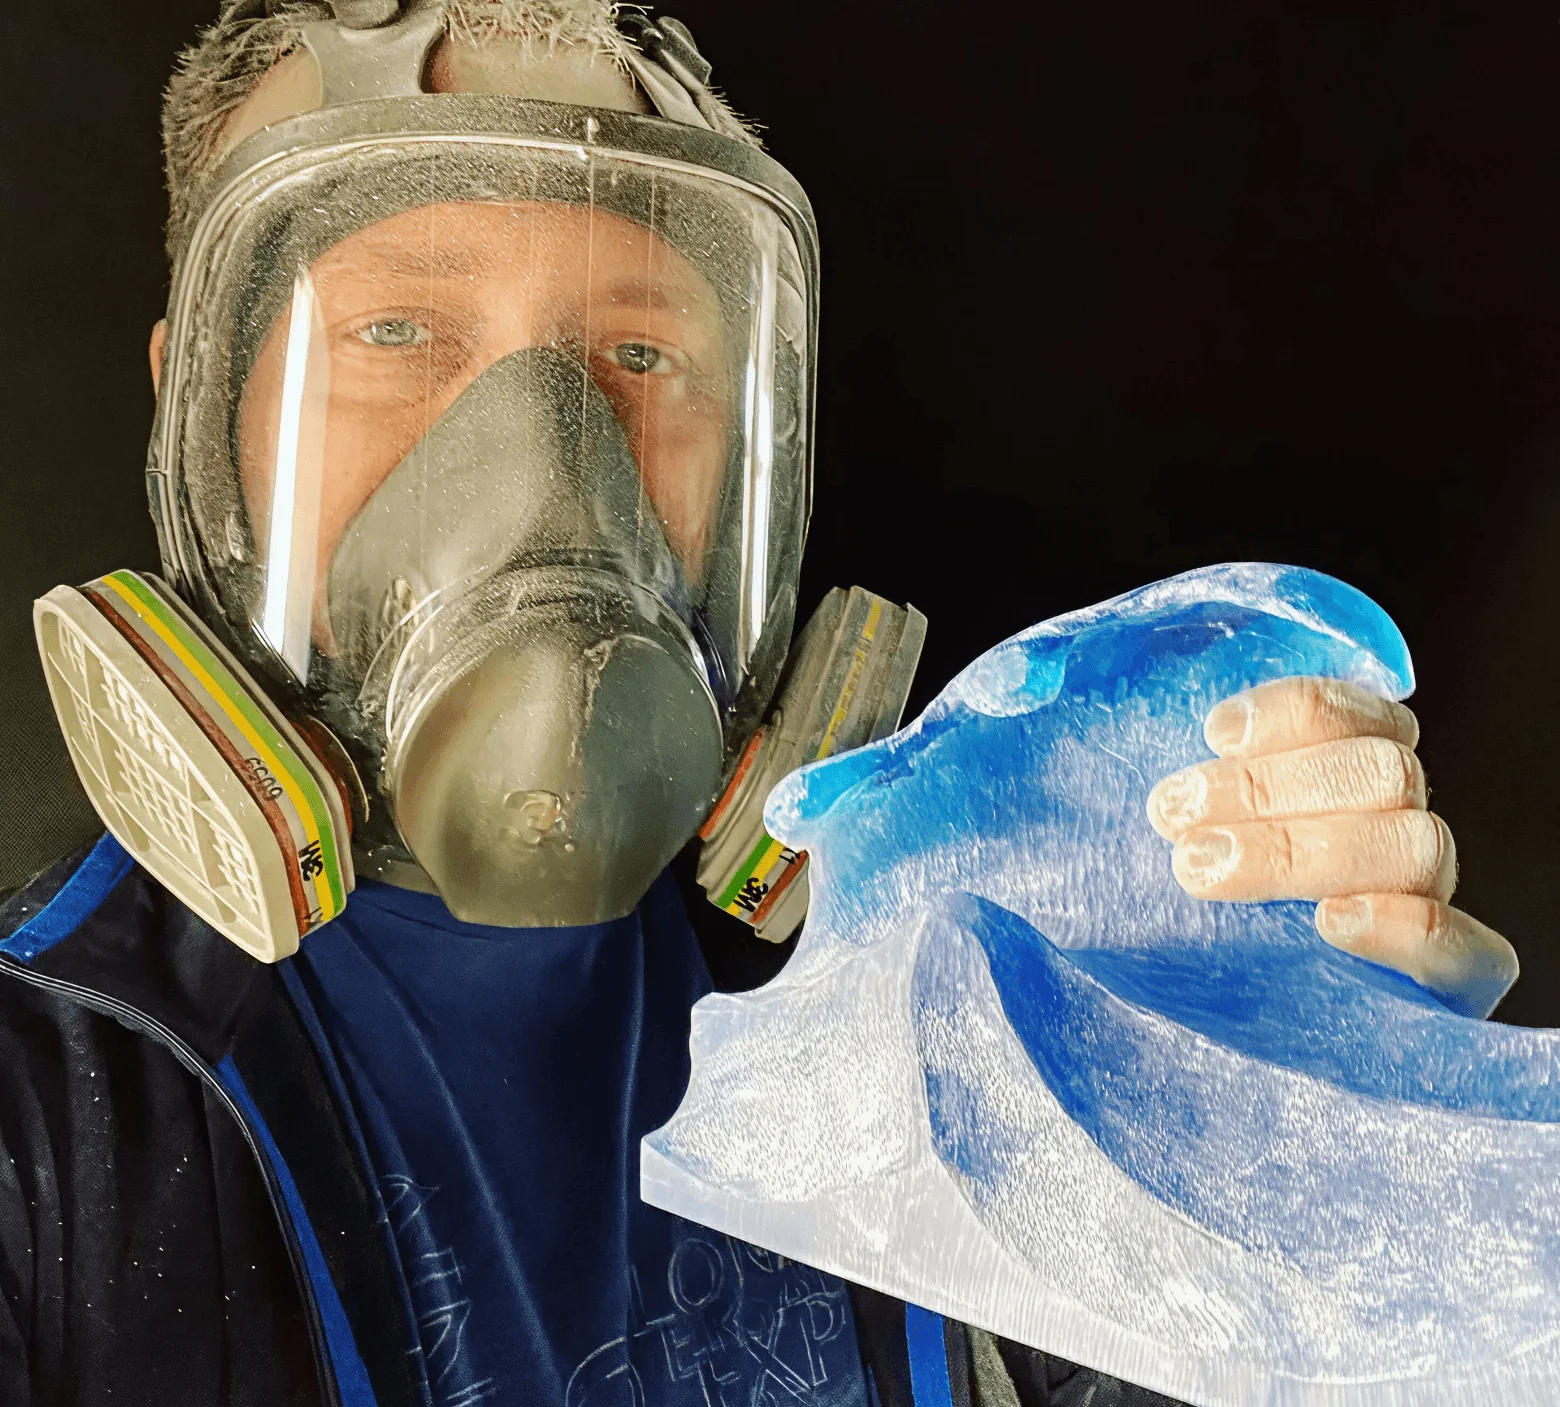
Transparent media. Water and glass are about underpainting and optics. First establish the color/value of the bed or backing, then add clear layers. Thickness, specular highlights on crests, softer troughs—reflections and gradients sell the effect, not “super gloss” alone.
Warm vs. cool. “Gray steel” can lean warm or cool. Warm half-tones feel alive; cool reads clinical. Train your eye to see color in “gray” via studies and side-by-side comparisons.
Tools: what to master and why
Tools extend your hand; what matters is knowing the effect each creates—not owning everything.
Cutting. Sharp utility knife with fresh blades, scalpel, rotary tool with the right bits. Clean cuts save hours of filling.
Sanding. Grits from coarse to fine, sanding sponges, needle files. Smooth groundwork = cleaner paint.
Painting. Brushes of different firmness; an airbrush matched to your tasks; a compressor with moisture trap. The airbrush isn’t a “gradient machine”—it’s tonal control and soft shadowing.
Measuring and layout. Metal ruler, square, calipers, templates. A millimeter off is visible at scale.
Assembly and holding. Tweezers, clamps, clips, rubber bands, magnetic squares. Glue only works when parts are held correctly.
Extras. Soldering iron/thermal cutter for plastics and foams, simple jigs for repeat parts, proper lighting. Light is half the battle—it reveals real texture and value before you shoot finals.
Bridging eye, materials, and tools
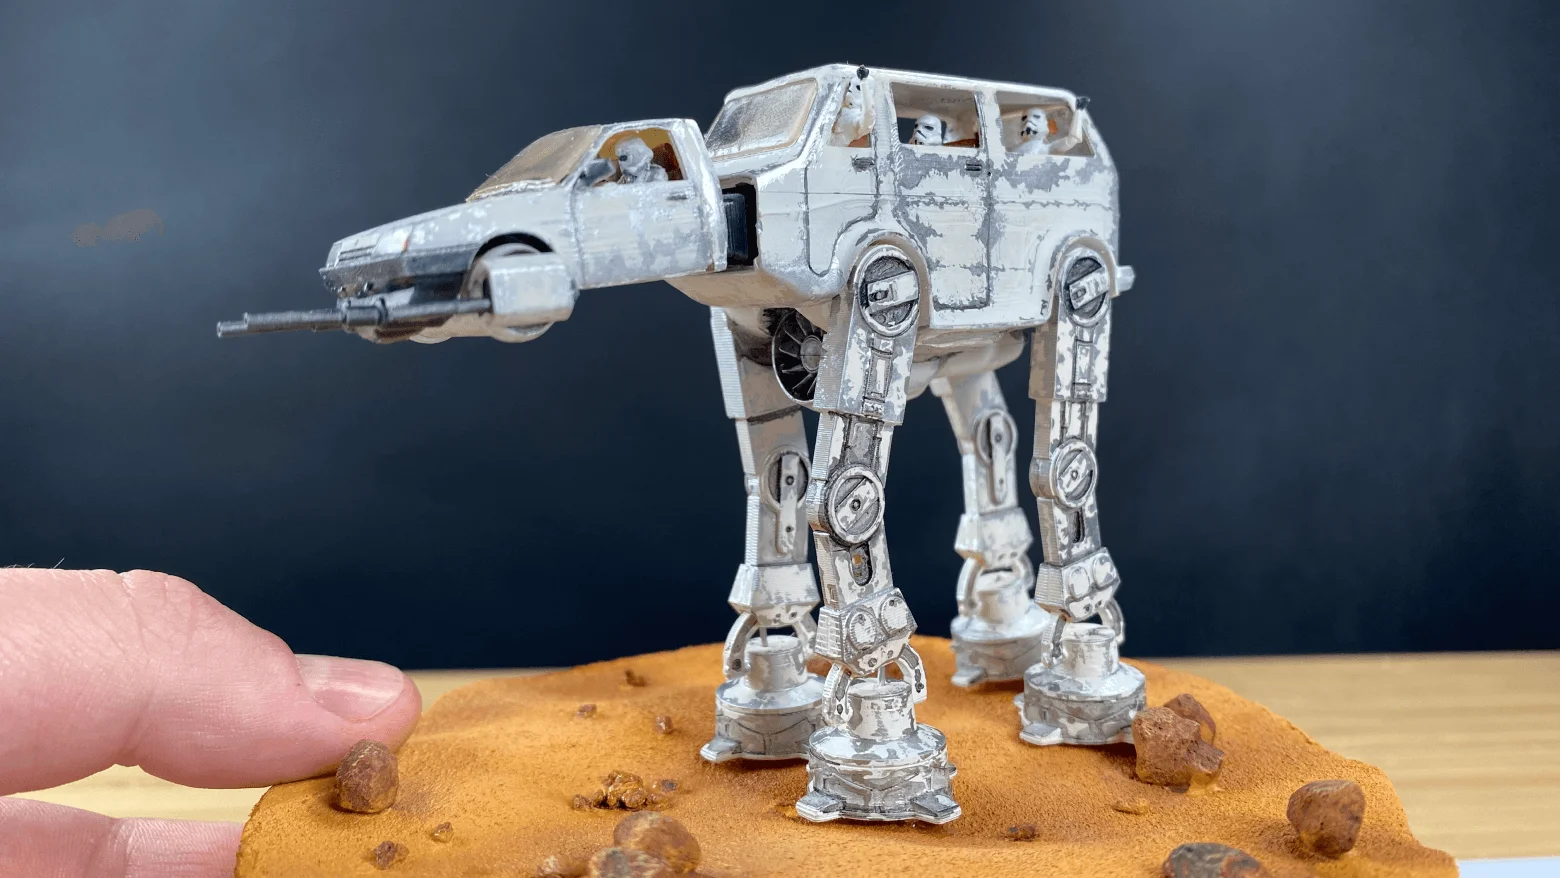
Do “curriculum builds.” One small model, one theme: “orange rust on aged enamel,” “wet stone and sea foam,” “dusty concrete with a pop of graffiti.” Gather references, write steps, choose materials and tools. Afterward, debrief what worked, what you overdid, and what to simplify.
Keep a decision log. A simple table: task → material → tool → technique → mistake → fix. In a month you’ll have your own playbook instead of random tips.
Record your process. Photos and video keep you honest—you’ll spot issues you missed live. They also feed your portfolio and feedback loop.
No art school? Examples
Plenty of prominent artists and makers never held an art diploma.
Henri Rousseau was self-taught, a customs officer turned icon of naïve art—his “outsider” eye became his style.
Jean-Michel Basquiat came from street art and became one of the most recognizable artists of the late 20th century without classical training—his energy was built on practice, not coursework.
Banksy—anonymous street artist and filmmaker—works across formats on concept and a keen eye for urban context, not credentials.
Grandma Moses (Anna Mary Robertson Moses) began painting later in life with no art school and became central to American primitivism.
Closer to the Caucasus, Niko Pirosmani was self-taught and is now part of the regional canon.
Across adjacent fields you’ll find many photographers, designers, and filmmakers who skipped formal programs yet built massive visual literacy through real-world practice.
The point isn’t to oppose education. It’s that curiosity, discipline, and learning from reality are decisive. School can help, but it doesn’t make the work convincing by itself.
What to do tomorrow

• Collect 30 references on a single topic and analyze them with the five questions above.
• Make one 2×2 inch study of the chosen texture.
• Note which materials and tools you used and what you lacked.
• Post the result and ask three questions: does the material read, did I overdo the effect, where does the eye go first?
Repeat that loop three times. You’ll be surprised how quickly quality climbs. Visual literacy becomes technique, technique becomes style, style becomes projects.
Education can be an accelerator, not a start button. For modeling you need curiosity, discipline, a trained eye, material know-how, and confident hands with your tools. The rest comes with practice.
Thank you for reading.
If you found this useful, please support the author.
Tip the author